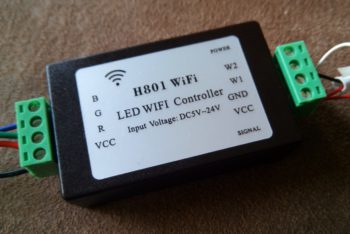
Two years ago I built a project that runs by the name of IRlicht (I was sure that I published it at that time — seems that I still have to). It does almost the same: it controls the brightness of LED strips. My own projekt does that on four channels: RGBW. Red, green, blue and white. This device controls RGBWW, meaning that it would be possible to attach for example a warm and a cold white strip, in addition to the RGB one.
My DIY-one is controlled via infrared remote control. This module is driven by an ESP8266, so it works in a WiFi network. I’m fooling around with a firmware for small WiFi-devices for a while, that communicates with the MQTT protocol. This module would be a great platform to use it on. It’s just questionable if it’s possible to get my own firmware to this off-the-shelf-device…
Turns out: yes. It’s possible. 

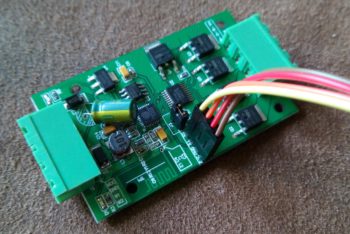
On the PCB — and thanks to great photos in most of the offering shops I knew that ahead of the purchase — is a well labeled serial interface. And right next to that is a connector that literally wants a jumper to be set on it. When the jumper is set, it’s possible to flash a new firmware over the serial interface. Right from the Arduino IDE. I just connected my USB-serial-interface between computer and the module (without connecting external power to it, I don’t know if that would have damaged anything), and I configured the module in the IDE like this:
- Board: “Generic ESP8266 Module”
- Flash Size: “1M (64k SPIFFS)
- Upload Speed: “1152200”
After connecting RX and TX in the right way, I was able to upload my firmware.
I mentioned to have an almost fully working firmware for my use, based on the excellent Homie for ESP8266 framework. ‘Almost’, because till now it just does RGB, not RGBWW. But the only thing I had to adapt for using RGB on this device instead of my usual hardware were the IO-Pins. The “Generic ESP8266 Module” header file doesn’t know any readable names for the pins, so I had to use the numbers. Andreas Hölldorfer already found out the mapping, though it seems that he’s got a different revision of the hardware. This worked for me:
| Pin | Function |
|---|---|
| 15 | Output red |
| 13 | Output green |
| 12 | Output blue |
| 14 | Output white 1 |
| 4 | Output white 2 |
| 1 | Internal LED green / Signal |
| 5 | Internal LED red / Power |
I like that, after initial flashing the OTA-Update (Over The Air) works. This way, I could already close the box again. All further updates will be uploaded over the air. 

